
How to enable TLS 1.2 on Windows 7
TLS 1.0 and 1.1 are now old and not secure. This article will shw how to enable TLS 1.2 on Windows 7. TLS 1.2 needs to be added manually by adding the following registry keys. Or by running an update from Windows Update. Without these changes, TLS connectivity to our Linux Web Hosting or Windows Web Hosting or Email Hosting may not function.
[HKEY_LOCAL_MACHINE\SYSTEM\CurrentControlSet\Control\SecurityProviders\SCHANNEL\Protocols\TLS 1.1\Client]
"DisabledByDefault"=dword:00000000

[HKEY_LOCAL_MACHINE\SYSTEM\CurrentControlSet\Control\SecurityProviders\SCHANNEL\Protocols\TLS 1.1\Server]
"DisabledByDefault"=dword:00000000

[HKEY_LOCAL_MACHINE\SYSTEM\CurrentControlSet\Control\SecurityProviders\SCHANNEL\Protocols\TLS 1.2\Client]
"DisabledByDefault"=dword:00000000

[HKEY_LOCAL_MACHINE\SYSTEM\CurrentControlSet\Control\SecurityProviders\SCHANNEL\Protocols\TLS 1.2\Server]
"DisabledByDefault"=dword:00000000
Once this has been installed, your Windows 7 PC will have TLS 1.2 enabled. You will then be able to connect with TLS on our SMTP, POP, IMAP and HTTPS protocols securely.
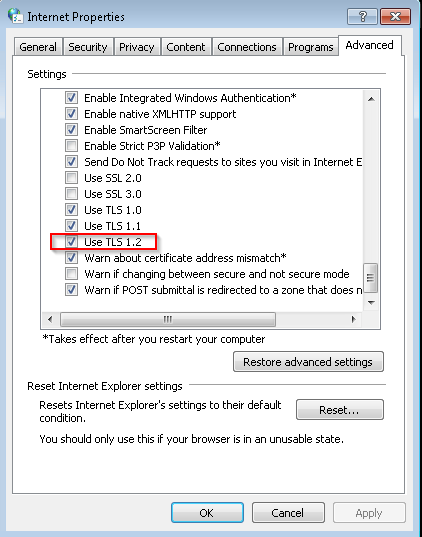
To verify that TLS 1.2 is enabled on Windows, simply go to the Internet Options in Windows.

Select the Advanced Tab, scroll to the bottom and check to make sure “Use TLS 1.2” is checked.
This is how to enable TLS 1.2 on Windows 7. For your reference, this is the MS Reference KB: http://support.microsoft.com/kb/245030
Another Method
Before you begin, update Windows 7 to ensure it has all the latest updates, particularly Service Pack 1.
Edit the Registry settings
1. Click on the Windows button and then choose Run.
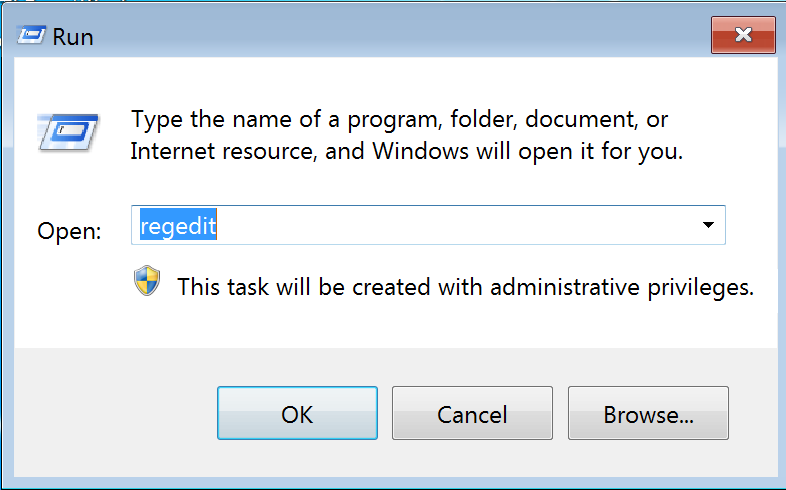
Enter “regedit” in the field as shown above and click OK.
This will open the Registry Editor.
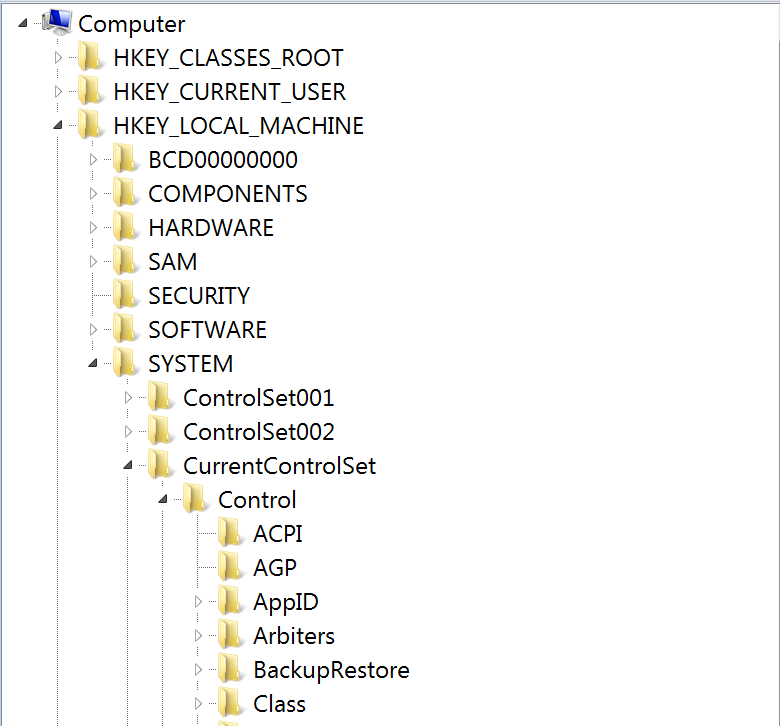
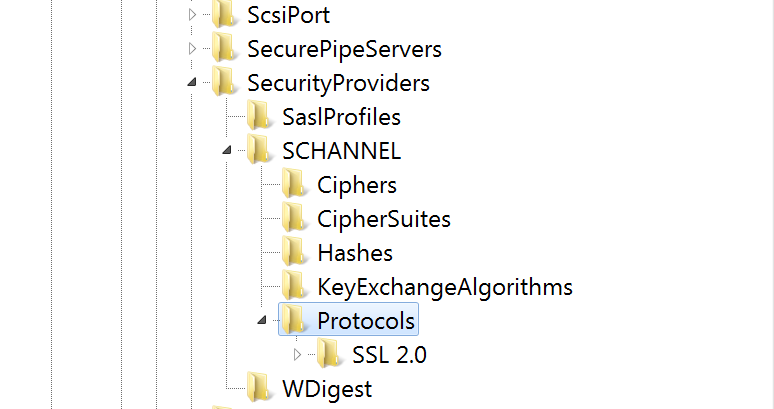
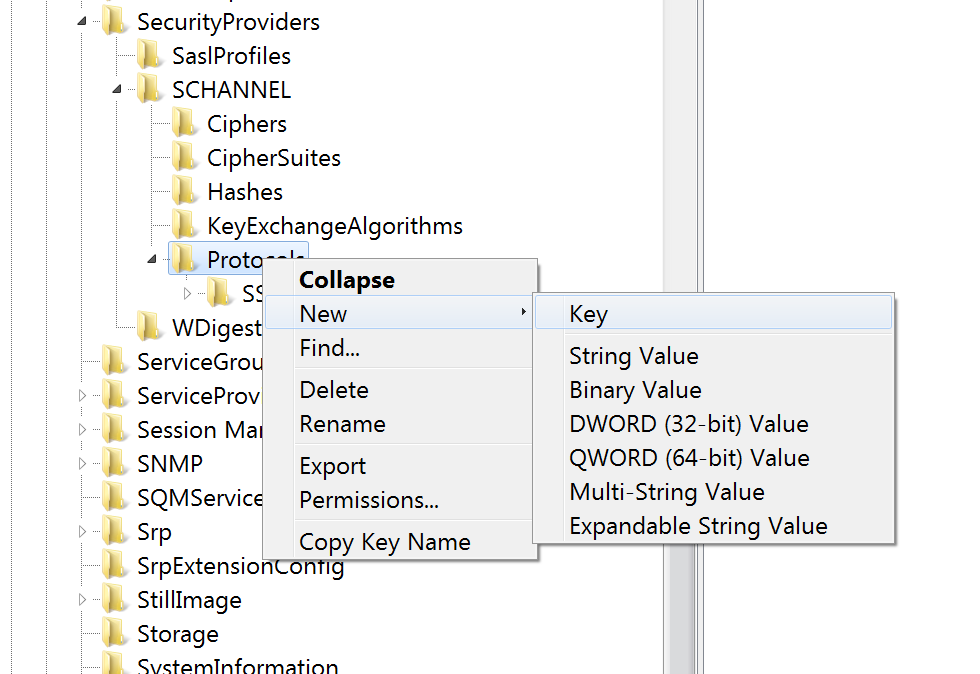
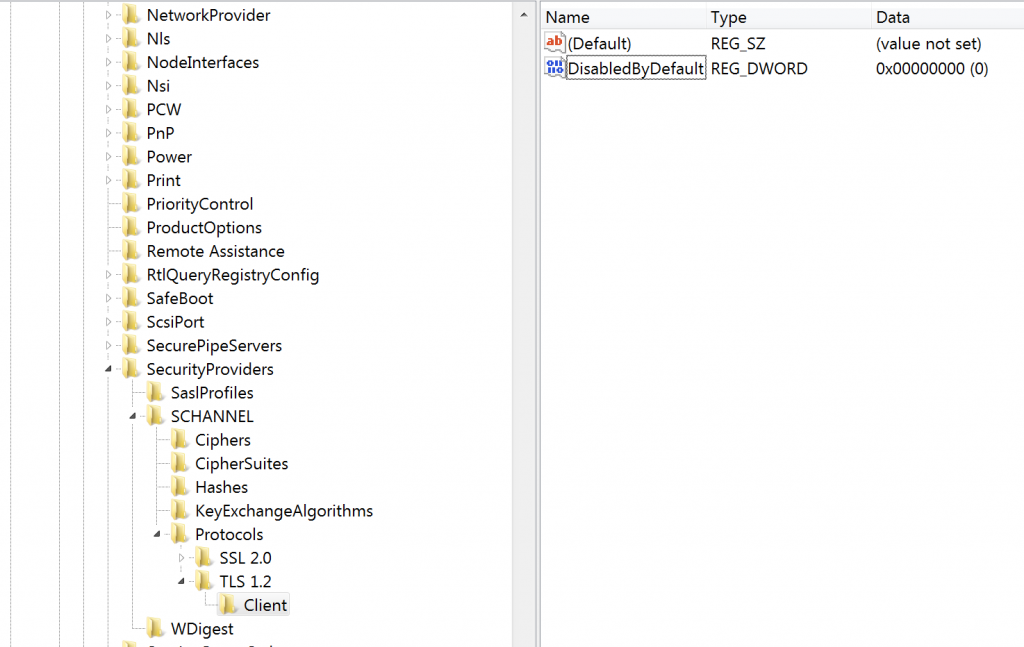
2. You will see a list of keys (they look folders). Open the keys in this following order:
HKEY_LOCAL_MACHINE > SYSTEM > CurrentControlSet > Control > SecurityProviders > SCHANNEL > Protocols
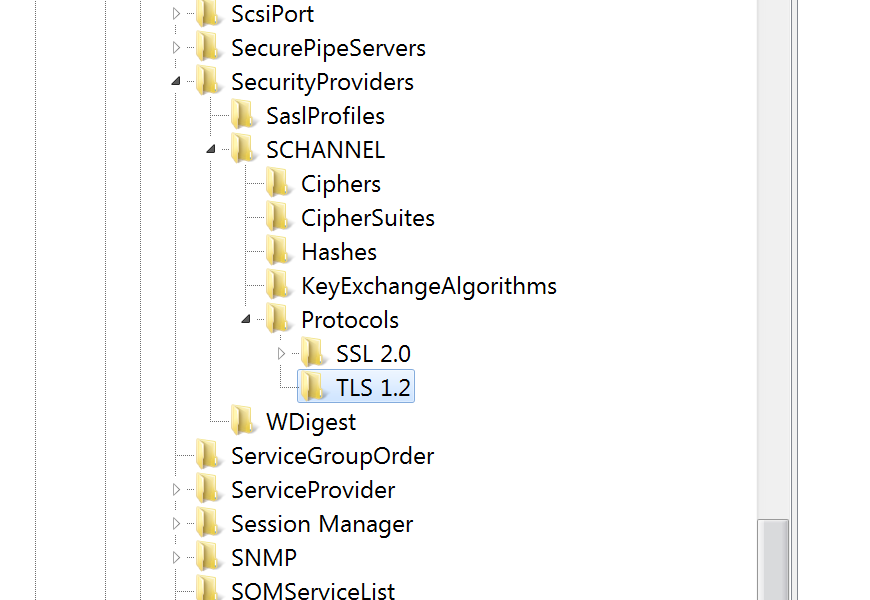
The two images below show you what this will look like. The second image is where you want to be as this is where you will make some changes.
3. Right-click on “Protocols” and choose the option New followed by Key as shown below.
You will see a new entry under SSL 2.0 that says “New Key #1” and you need to rename this key “TLS 1.2”. You should just be able to type this as the key name will be in edit mode already, but if you need to right-click on the new key and choose Rename. You should now have what is shown in the image below.
4. Right-click on the new key you just created and choose New followed by Key. This is just the same as you did in the previous step.
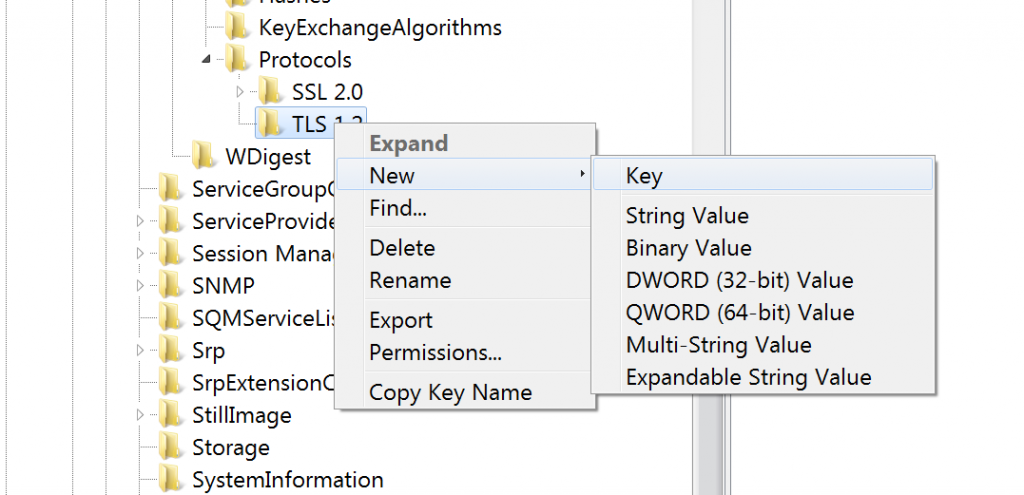
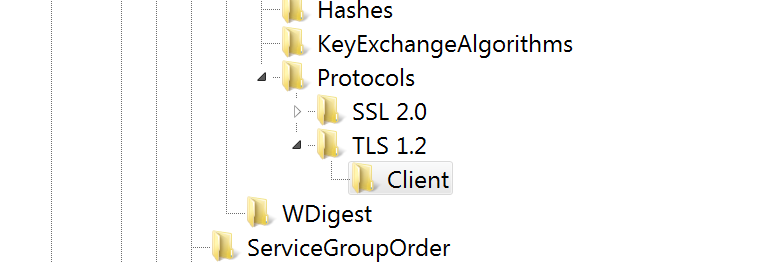
As before, the new key will be called “New Key #1”. This time rename it to “Client”. You should then have the key arrangement shown below.
5. Right-click on the new key you called “Client” and choose New and then DWORD (32-bit) Value.
This will create a new value in the window to the right called “New Value #1”. Right-click on this entry, choose Rename, rename it to “DisabledByDefault” and press enter.
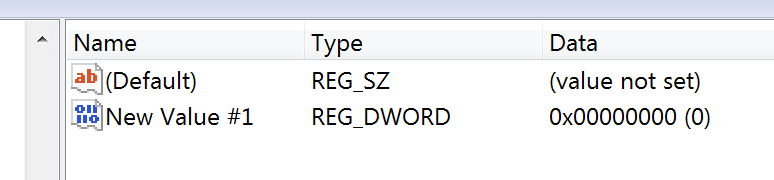
You should now have the arrangement shown in the image below. If you do, proceed to step 6.
6. Now closed the registry editor and restart your computer. A restart isn’t always required, but is recommended. Windows 7 TLS 1.2 will be working.