
How to add my Exchange 2016 mailboxes?
Once your Exchange 2010 or 2016 account is setup, you will want to add your mailboxes to get going. There are only a few steps to get you going.
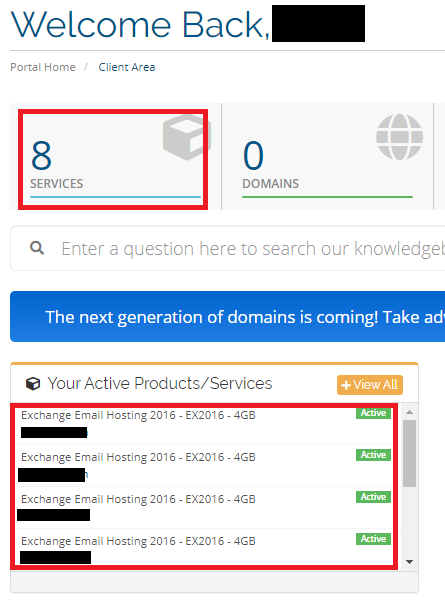
1. Login to the client panel at https://client.hosting.ca/
2. Select the exchange service by clicking the “Services” at the top or below under “Your Active Products/Services”.
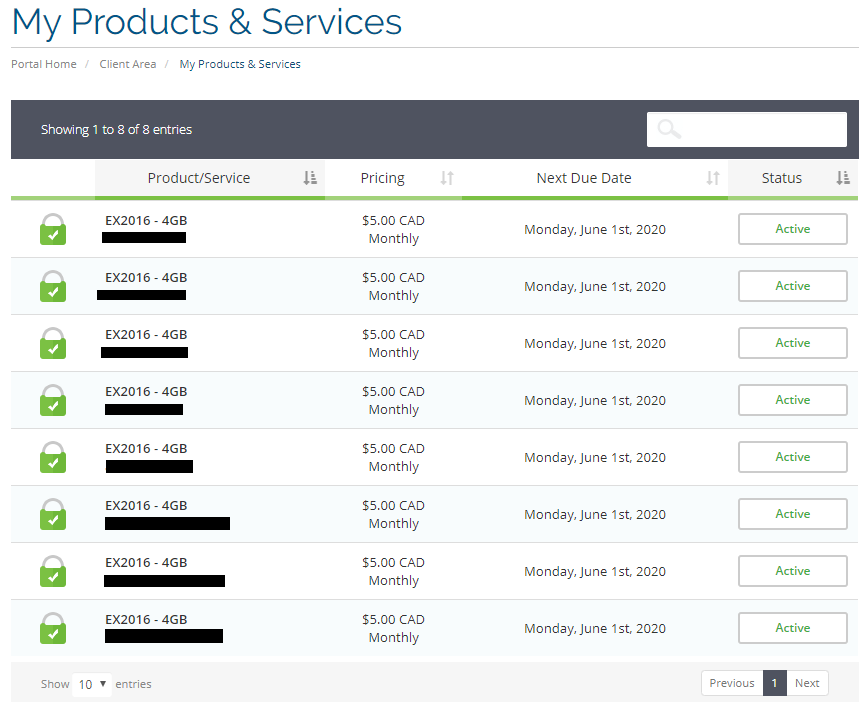
3. Now select the proper plan you wish to login to. Sometimes we may have different domains with different accounts. Or sometimes your domains will be all in the same account. Select the appropriate one.
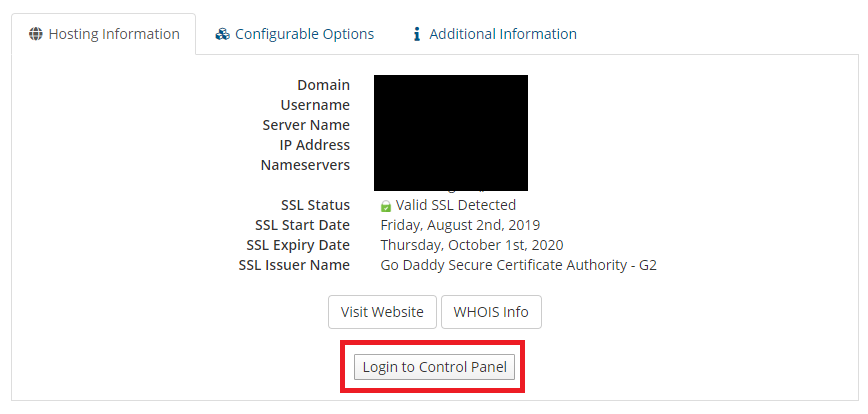
4. Now you’ll be able to login to the provisioning panel. At the bottom, select “Login to Control Panel”.
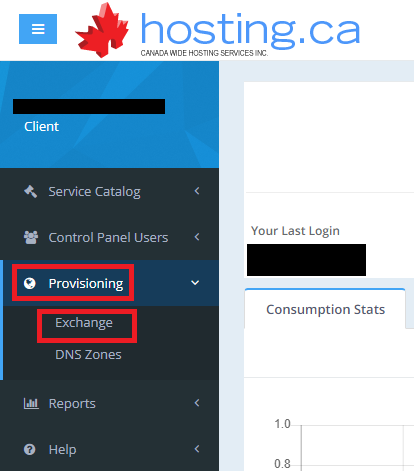
5. Once the new window opens, you can add your mailboxes by selecting “Provisioning” and then “Exchange”. On the right you will see Mailboxes, select that.
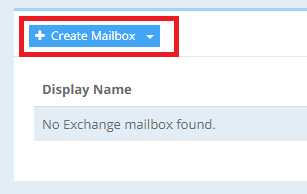
6. Select “Create Mailbox” to start the mailbox creation process.
7. Enter in the user details for the mailbox. The most imporant part is the email address, the password, and then the mailbox size.
